
Create a Snapchat Account
In order to start advertising with Snapchat, you'll first need a Snapchat account! This allows you to log into Ads Manager. You can set up an account online or right from your phone.
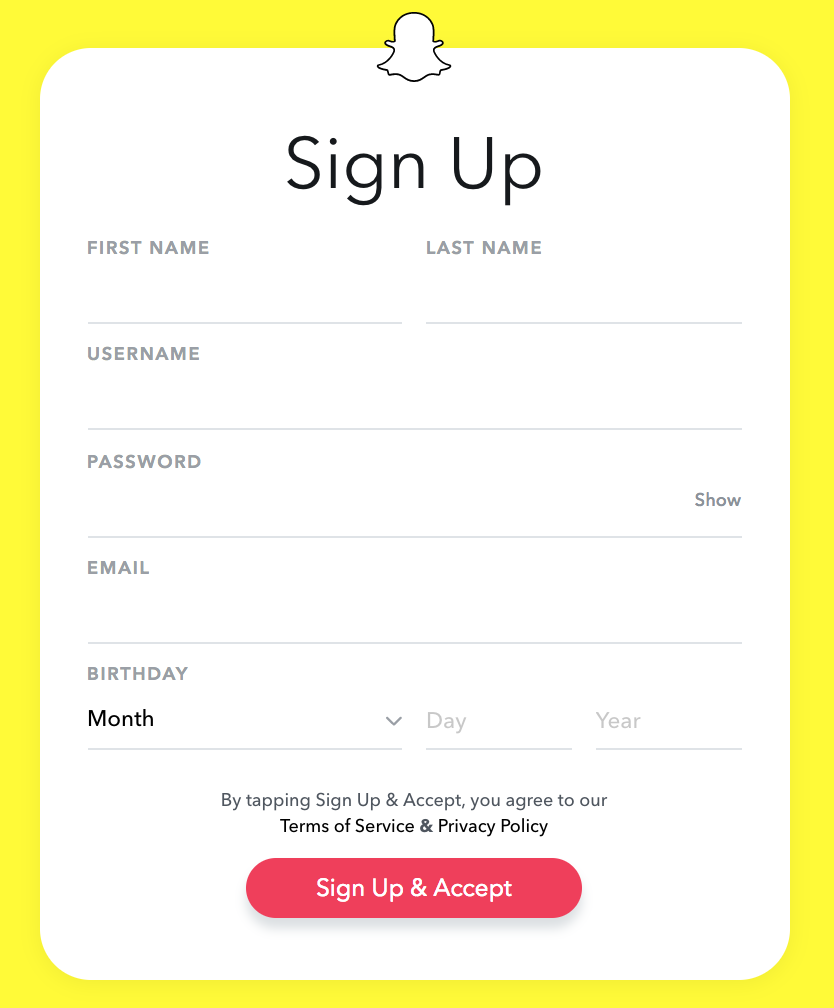
To set up your account online, please follow the steps below.
- Go here.
- Enter your name and a username. Please Note: You cannot change your username after you've created it. Additionally, only your name and the invited email address will be displayed to you or other members of your business. Your username will not appear.
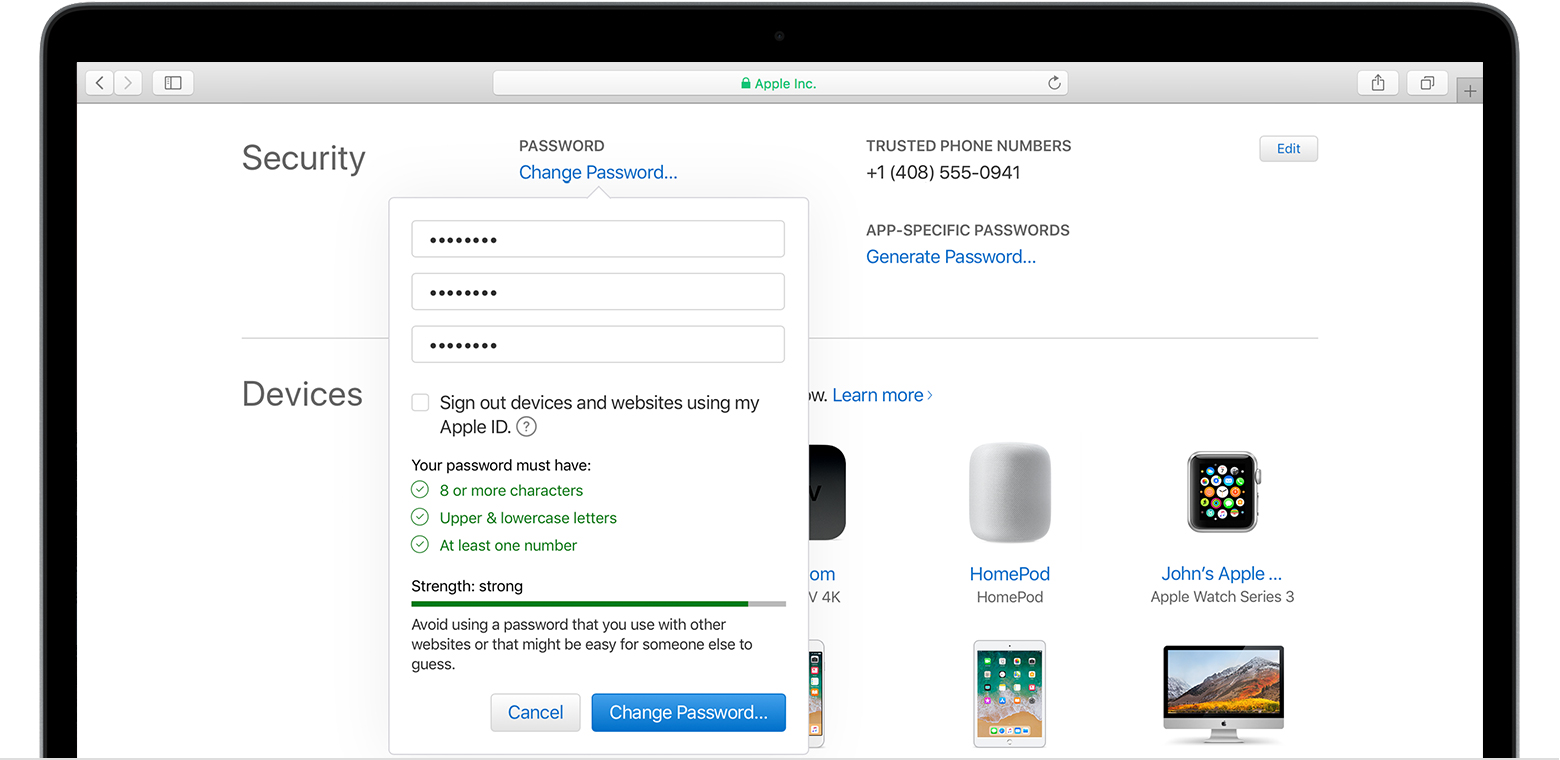
- Make a secure password that will be easy to remember.
- Enter in a valid email address.
- You can then verify your account to secure it by downloading Snapchat on your phone.
- Now you can use your username and password to access Ads Manager. Then you can begin advertising on Snapchat!
To set up your account on your mobile device, please follow the steps below.
- First, you'll need to download the Snapchat app for iOS or Android.
- Open the Snapchat app.
- Tap 'Sign Up' to create a new account.
- Enter your name and date of birth.
- Create a username. Please Note: You cannot change your username after you've created it. Additionally, only your name and the invited email address will be displayed to you or other members of your business. Your username will not appear.
- Make a secure password that will be easy to remember.
- Enter in a valid email address.
- Enter your phone number and verify it. This step is optional, but if you get locked out of your account for any reason, we'll now be able to send you a password reset link over SMS.
- Now you can use your username and password to access Ads Manager. Then you can begin advertising on Snapchat!
To comment on this article and other Technotech Inside content, visit our Facebook page or our Twitter feed.
 3.
3. 


